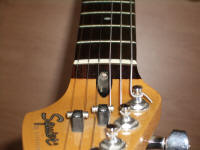
Truss rod adjustment
There are a couple of areas of guitar maintenance and adjustment that players would be better off if they could do them on their own, when needed. Some aren’t comfortable doing it, and that’s ok. Lots of people work on their own cars and lots of people take them to a garage. The same is true for guitars.
The term we need to get comfortable with is relief. Relief refers to the position of the headstock in relation to the plane of the fingerboard. A good way to understand this is to envision what exactly we are relieving and that is string space above the frets. If the strings on a guitar are 1/2″ off the frets then the guitar has way too much relief. If the strings are actually resting on the frets then they have no relief. We adjust relief by adjusting the truss rod:
TIGHTEN the truss rod to REMOVE relief
LOOSEN the truss rod to ADD relief.
How to do it? First, to do it alone you’ll need a capo. Even if you never use a capo to play, it’s worth getting one just to make these kinds of adjustments. It will pay for itself the first time you use it to set up your guitar. Don’t get the cheapie capos that have an elastic strap with metal eye holes in the strap, or if you do, make sure you put a protective cloth between the metal eye holes and the finish on the back of your neck. They can and will scratch your finish. If you don’t have a capo then you need a friend with at least one hand.
Tune your guitar to 440 concert pitch (A string is tuned to A. Standard tuning; no alternate tunings.) Capo the first fret. Fret the 6th string at the 15th or 16th fret. Take 2 business cards and slip them between the 6th string and the 7th fret. Do the cards actually lift the string up to squeeze in? You need to add relief. This means that your guitar probably had low action but buzzed pretty badly when you played. Do the 2 business cards slip inbetween the 7th fret and the 6th string without touching either? This means you need to take away relief. Your guitar probably has high action and no buzzing.

The more complicated adjustment is to remove relief/tighten the truss rod. The first thing we need to do in this adjustment is to detune the guitar to remove string tension. You do not want to adjust this truss rod fighting the pulling energy of the strings. This is a major and common mistake by inexperienced technicians and can quickly lead to stripped nuts or wrenches or worse.
Once you’ve loosened the strings, place the adjustment tool into the truss rod end and make sure the tool is fully engaged and properly inserted. If the guitar is older or it’s been a while since the last adjustment, it’s probably a good idea to first note where the truss rod nut is and then loosen it. If the nut won’t loosen, chances are it won’t tighten either and you could stand a chance of doing some serious damage here. If it loosens well, then, noting where the nut was when you first started, begin to tighten it.
Go with about 1/4 of a rotation, CLOCKWISE, so say you move the nut from 6 o’clock to 9 o’clock, then stop. Tune it back up, re-capo, re-check your measurement at the 7th fret while fretting higher up on the neck. Perfect? You’re done. Need to go some more? Uncapo, detune, and adjust more, this time going only about 1/8 of a turn. Tune up, capo up, measure, etc. If you still need to adjust more, go about 1/8 to 1/4 more if the nut turns easily enough. You don’t want to adjust too much in one day. Here’s part two; the neck can/will continue to move after the adjustment is made. Sometimes you dial it in perfectly and then a couple of days later actually have to go back and adjust it the other way.
The key point I want to make in this adjustment is NEVER FORCE THE TRUSS ROD. If it’s too hard/stiff to move then take it in to a shop. If after the first day of adjustment you still need to adjust further do it as long as you go about 1/2 a turn a day and give it a day to settle in. If the nut becomes too difficult to turn and you still have a ways to go, take it in.
To loosen the truss rod to add relief, the strings pulling tension actually help you make this adjustment, so don’t detune them. Again, making sure the adjustment tool is properly inserted and fully engaged, turn the nut 1/4 turn COUNTER CLOCKWISE from about 6 o’clock to 3 o’clock. Tune it, capo it, check it out.
That’s it! No mystery. If you try and can’t do it, take it in, but try it first. It’s not rocket science.